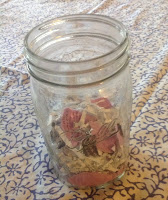
Paper Mill in a Mason Jar
Overview:
- Students will make their own paper using mason jars, small tubs, hand-held blenders and other materials that minimize “out-of-seat time” and “just-sit time.”
- This session is suitable for most students, including typically developing students, intellectually disabled students, mobility impaired students, and students who have difficulty with focus and impulse control.
- Create tactile works of art;
- Understand that paper and fiber can be recycled.
Optional Materials: Drier lint and bits of fiber; sparkles; dried flowers; pine needles; dried leaves; essential oils.
You will need to have access to a counter or other flat surface on which all paper can be stored while drying.
Make sure all preparation and storage areas are protected, as water will probably soak through.
Procedure:
1. Provide each student with a wide-mouthed mason jar.
3. Fill the jar halfway with hot water. Cover and soak until paper softens. (Although it is recommended that it soak over night, I have soaked it for as little as 10 minutes with good results.)
4. When the paper has soaked, use a hand blender to blend it into a pulp, covering the top of the jar with a napkin to minimize spilling. At this stage, a very small amount of glitter may be added. Too much will cause the pulp to form clots. Small amounts of leaves and flowers may also be added now or after blending; again large amounts may cause clotting. Adding flowers after blending will keep them whole. Essential oils may be added for scent.
5. Some students are sensitive to the tactile sensation of touching pasty substances. Calmly, matter-of-factly point out, “Some people don’t like to touch wet things, and there are plastic gloves available for anyone who wants them.”
6. Students should place their screens on top of their plastic storage containers and pour the pulp over the screen as evenly as possible. Allow the pulp to drain into the plastic container. Using sponges or wooden spoons, spread the pulp out to even it more. Dried flowers may be added at this point.
7. When the pulp has drained, lift the screen and place it on a napkin, tea towel, or reusable cleaning cloth, leaving enough room to fold the cloth over the screen. The texture of the cloth will be transferred to the paper, so students should choose their cloths carefully.


8. Fold the cloth. While keeping the screen covered, flip it over.
9. Unfold the cloth, gently remove the screen, and cover the paper again.
10. Roll with a rolling pin.
11. Allow the paper to dry slightly overnight.
12. Carefully smooth the cloth to avoid transferring creases. With the paper covered by the cloth, iron.
 13. Unfold the cloth, but do not remove the paper until it is completely dry.
14. Keep the paper as is, mark it with a straight edge and trim it, or cut it into shapes. .


No comments:
Post a Comment